Technique verse creativity.
You need both to be a great guitar player.
Too much of one highlights the lack of the other leaving you out of balance.
Too much technique and not enough creativity will have you sounding more like a machine than a musician.
Too much creativity and not enough technique will have you unable to execute your creative ideas effectively.
Today I am going show you how to apply some basic fingerpicking patterns to create great sounding music on your guitar. The patterns alone will be rather uninspiring, which is to be expected.
However once I give you some examples of applying these patterns to a chord progression on your guitar, they will come to life and you will start to realise the potential of how great fingerpicking patterns can sound when applied creatively to your guitar playing.
The thing is, it’s not your picking hand alone that will get you a great fingerpicking sound. The fretting hand plays a major role too.
In order to highlight this point, I will only use a single chord progression throughout this lesson. Listen to the variety of sound we can get when applying a few simple fingerpicking patterns to this progression.
Patterns For Fingerpicking Your Guitar
I am going to begin here by showing you 3 common fingerpicking patterns.
In isolation these patterns won’t do much for you. In order for them to sound musical we need to apply them, which we will be doing shortly in very creative ways.
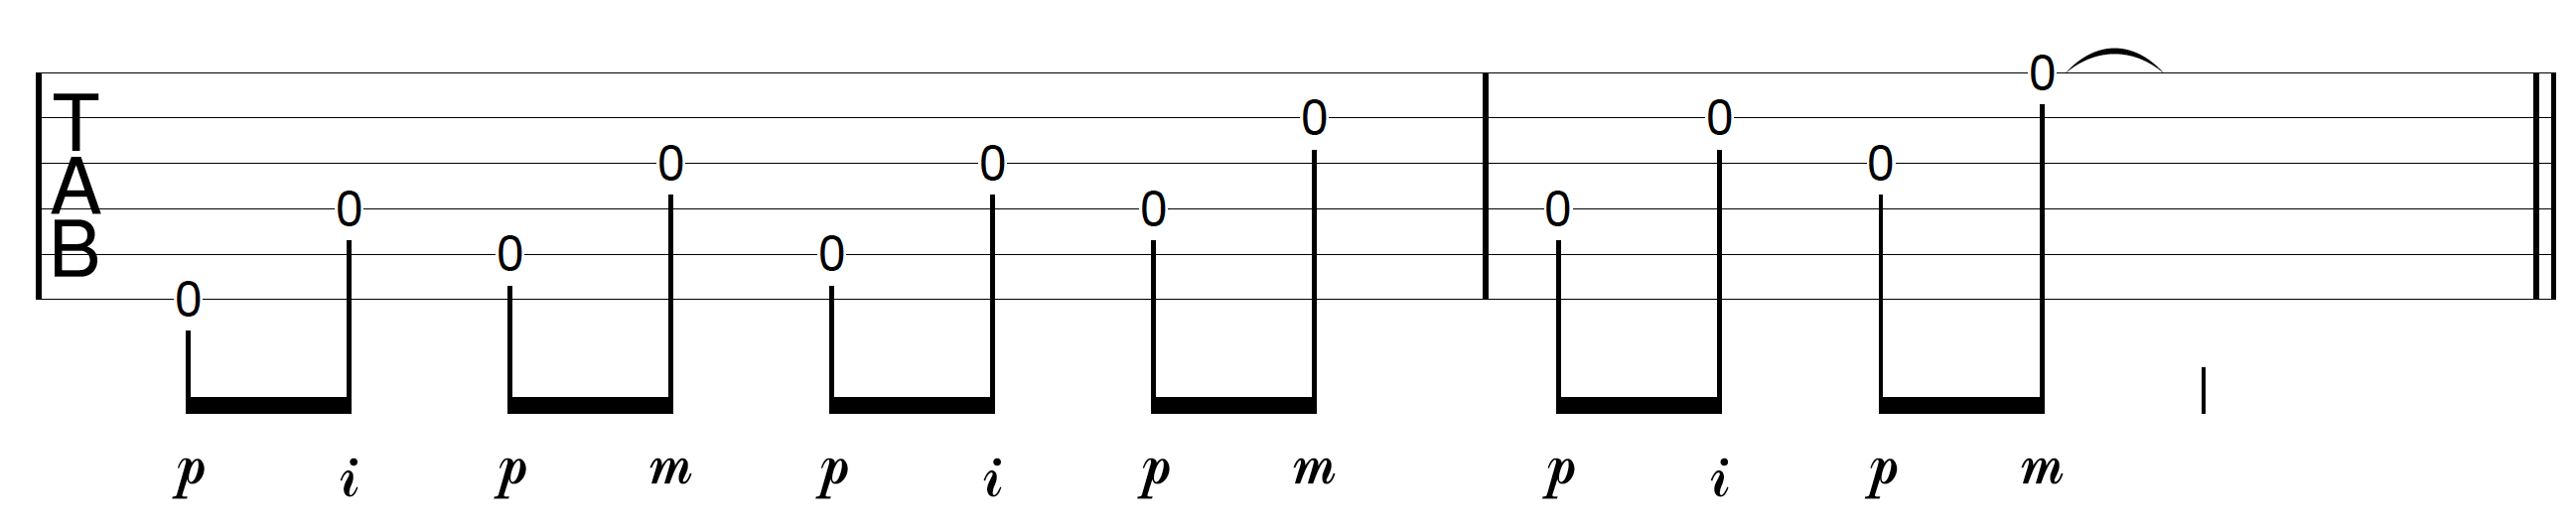
Fingerpicking Pattern 1: Open String
This first fingerpicking pattern doesn’t really have a name, at least that I know of. It’s a little more generic, but can sound mind blowing when applied in certain ways to your fingerpicking.
I use this pattern and versions of it a lot with fingerpicking solo lines that involve the use of open strings, so I will refer to it as the open string pattern.
Here it is ascending:
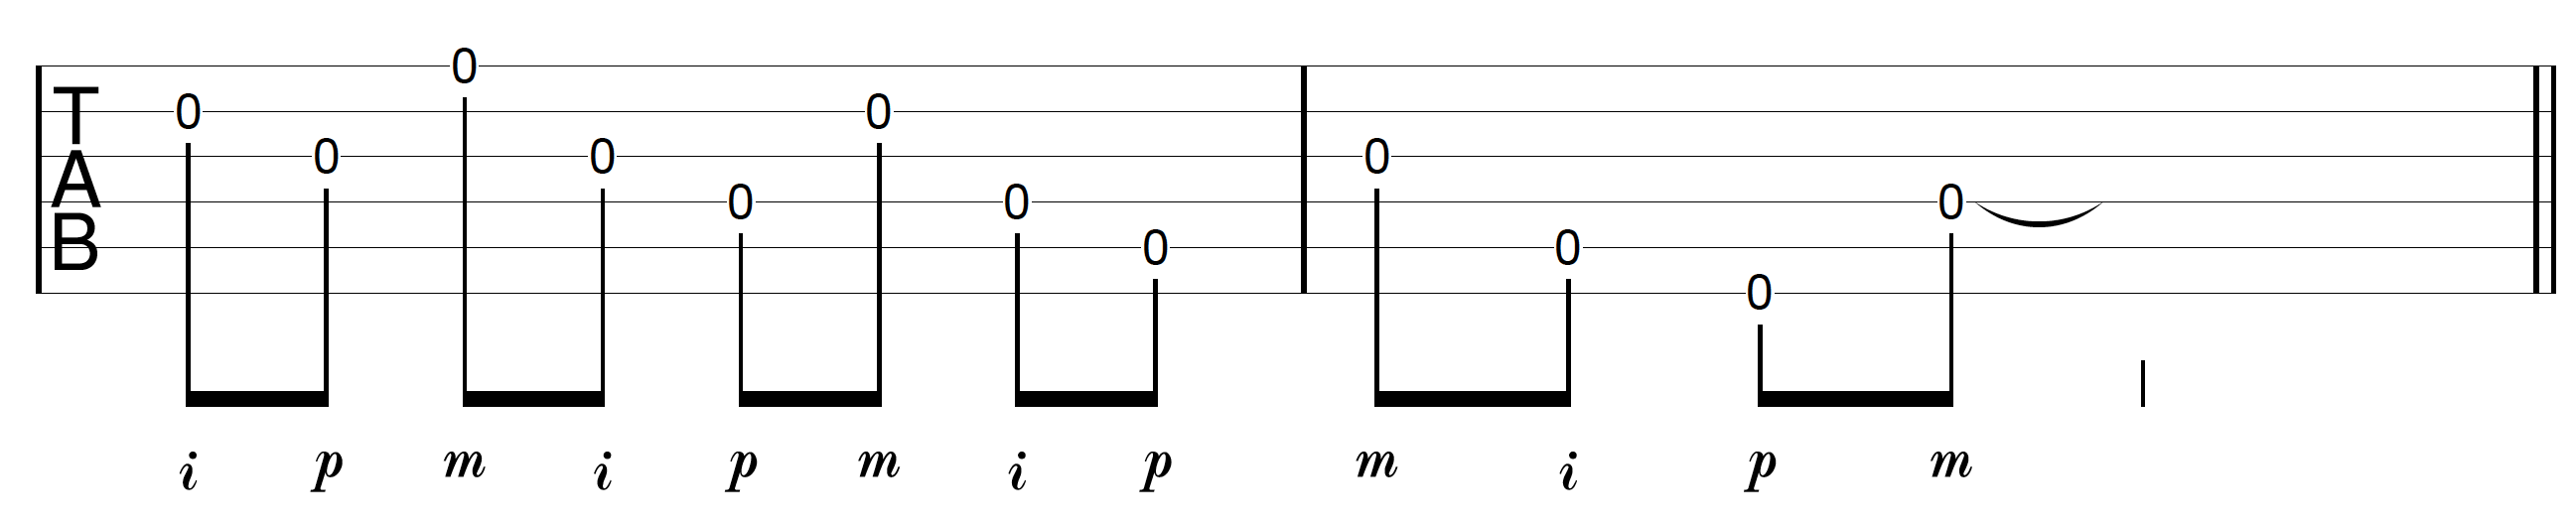
And here it is descending:
Open String Pattern Descending
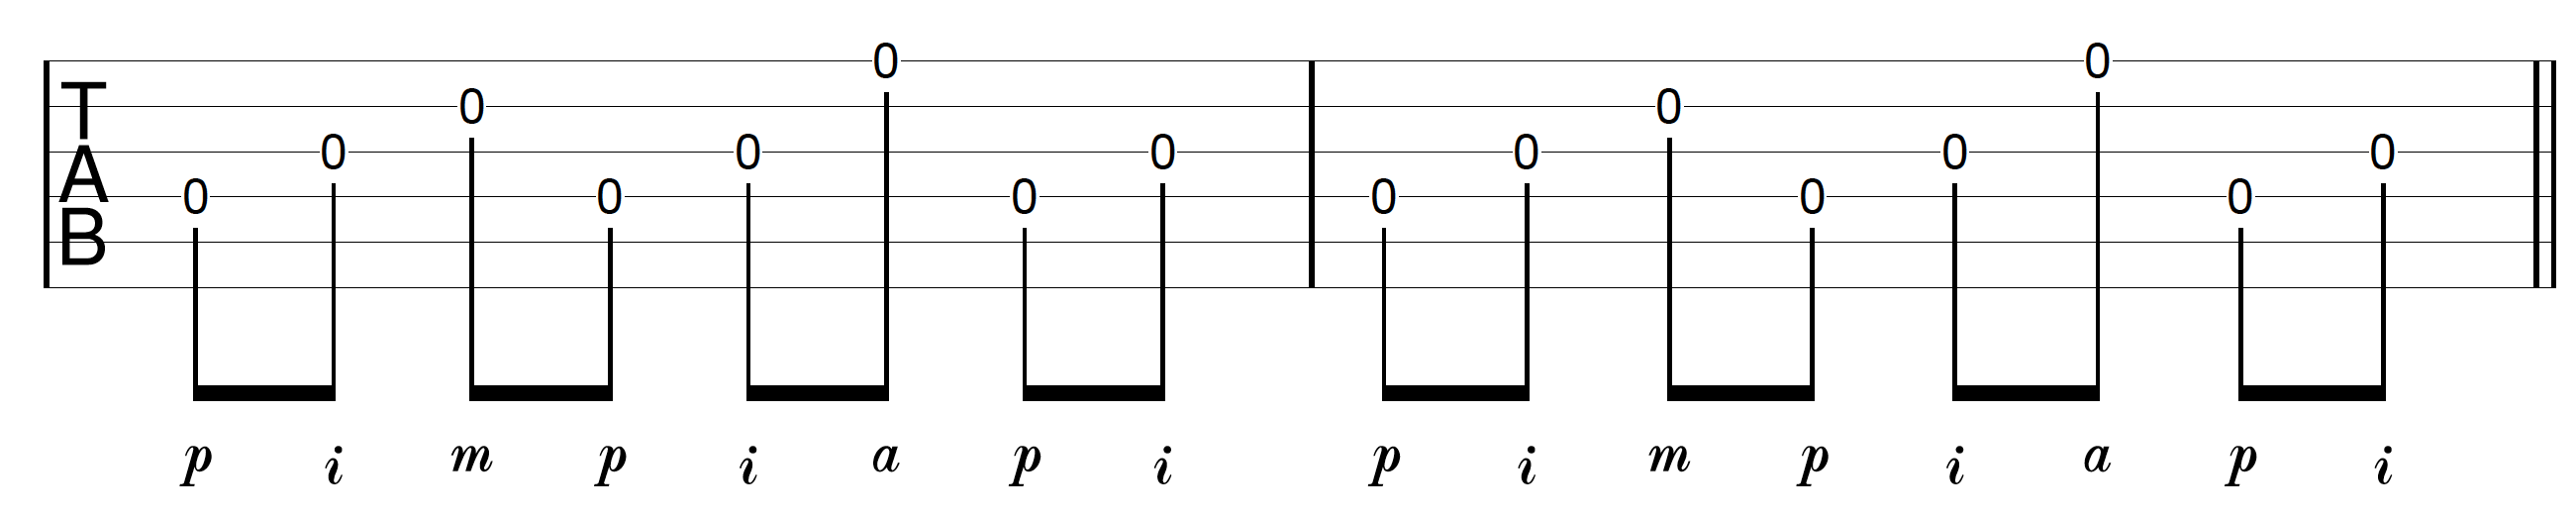
Pattern 2: The Banjo Roll
Next up is a forward banjo roll pattern:
These types of patterns are taken from the banjo, hence the name, and can be used in all sorts of very cool and unique sounding ways on the guitar as you are about to hear.
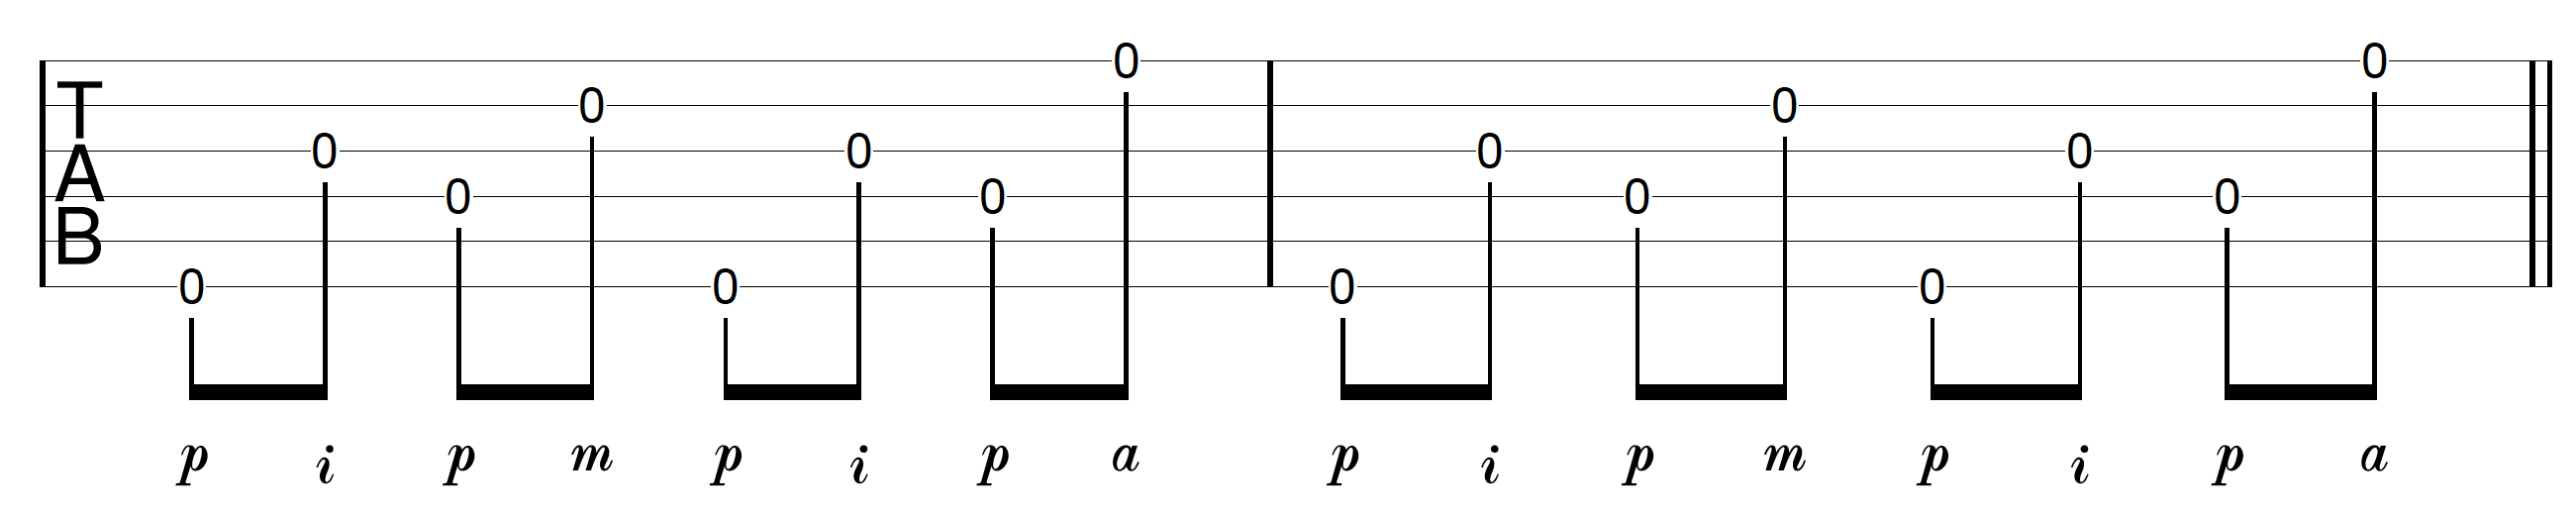
Fingerpicking Pattern 3: Clawhammer
The following pattern, while not the clawhammer technique that is associated with the banjo, is arguably the most commonly used fingerpicking pattern there is.
It is often referred to as travis picking, however there is a lot more to travis picking than this pattern alone, so I prefer not to call it this.
This patterns centres around the thumb of your picking hand plucking bass patterns on the lower 3 strings. Your remaining fingers pluck notes on the higher 3 strings on and around these bass notes.
The bass notes always fall on the beat.
This provides the backbone for the pattern and is the most important component to it.
While there are many possible combinations of this pattern, here is one using open strings to get you started:
Clawhammer Fingerpicking Pattern
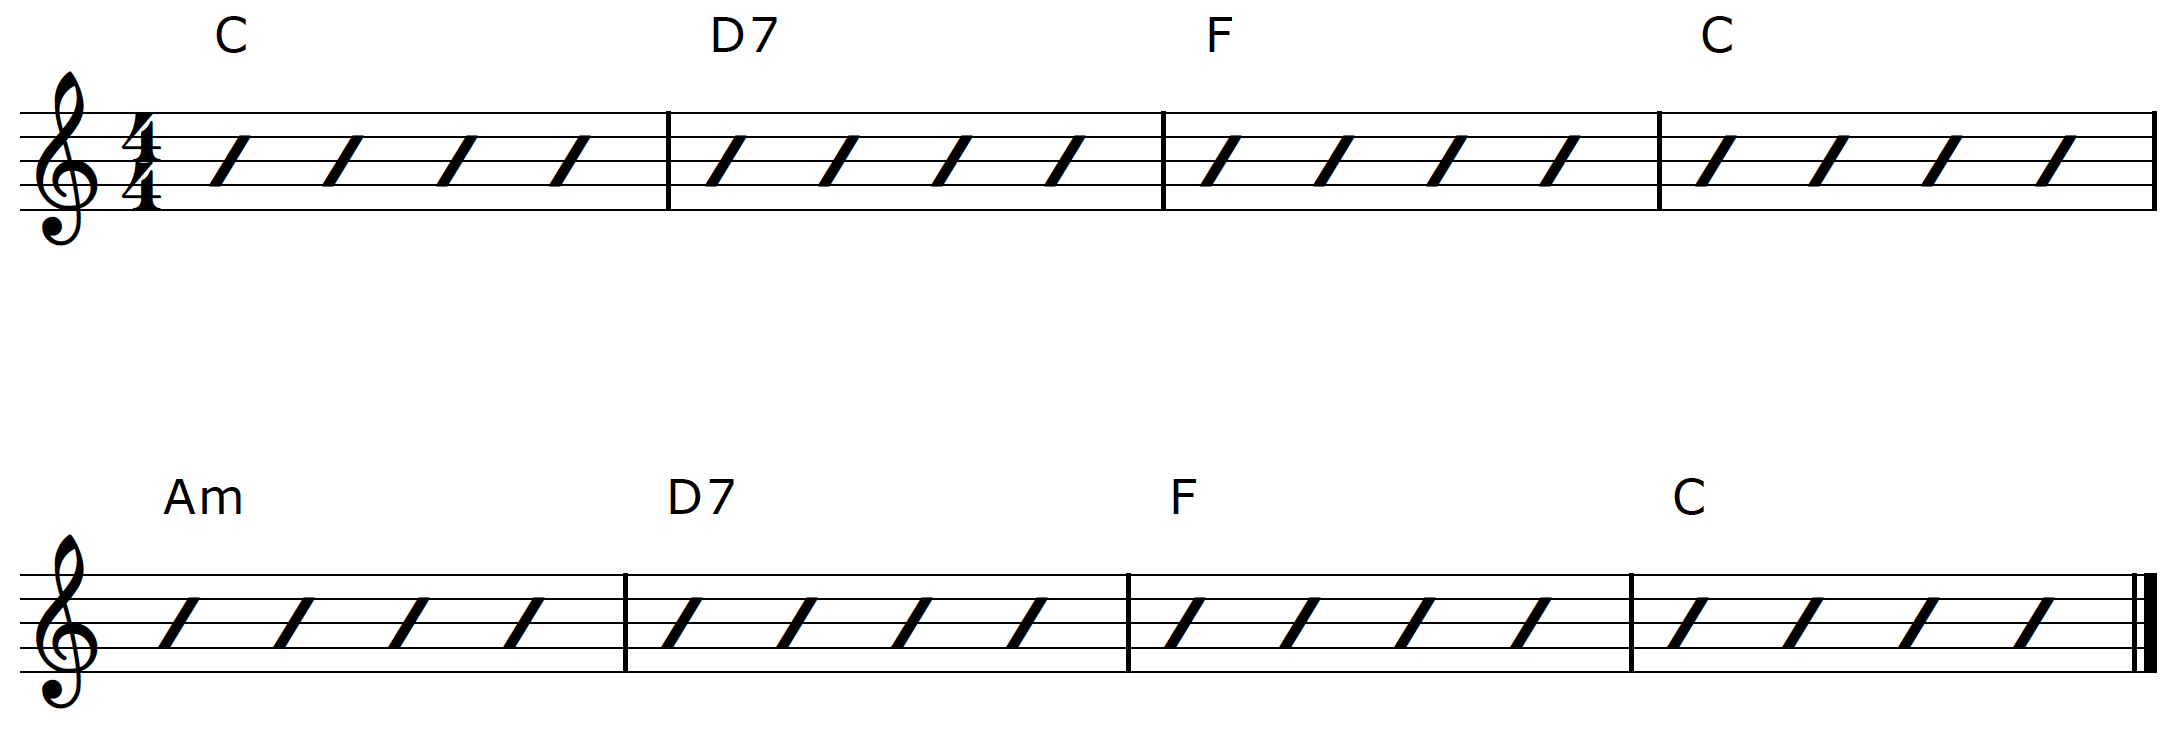
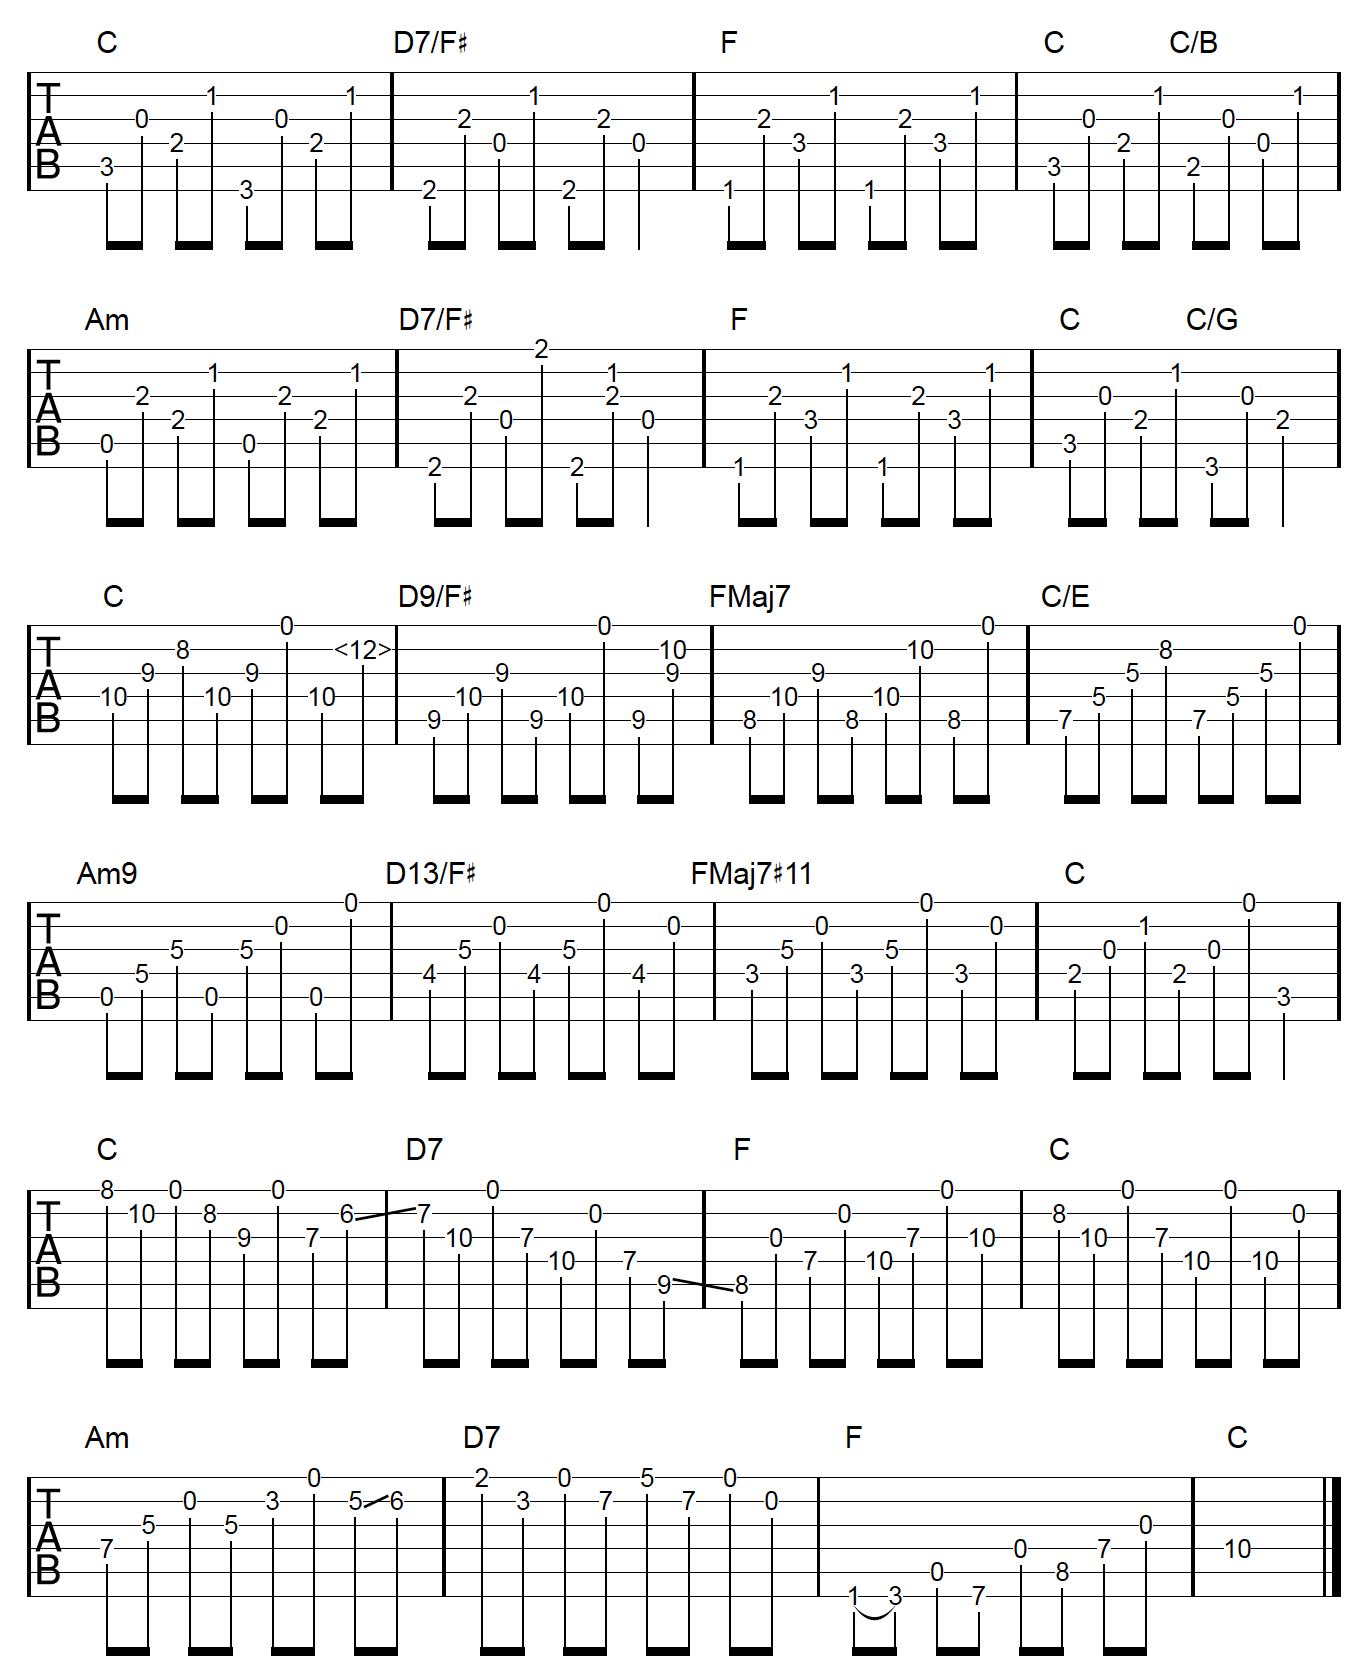
Our Chord Progression
Throughout this lesson I am only going to be using one chord progression to apply each fingerpicking pattern.
Here is that chord progression:
Fingerpicking Chord Progression
By using just one progression you will see just how different we can make it sound with our patterns. However it’s more than the patterns at play here that contribute to the great sounds we will be getting from this progression.
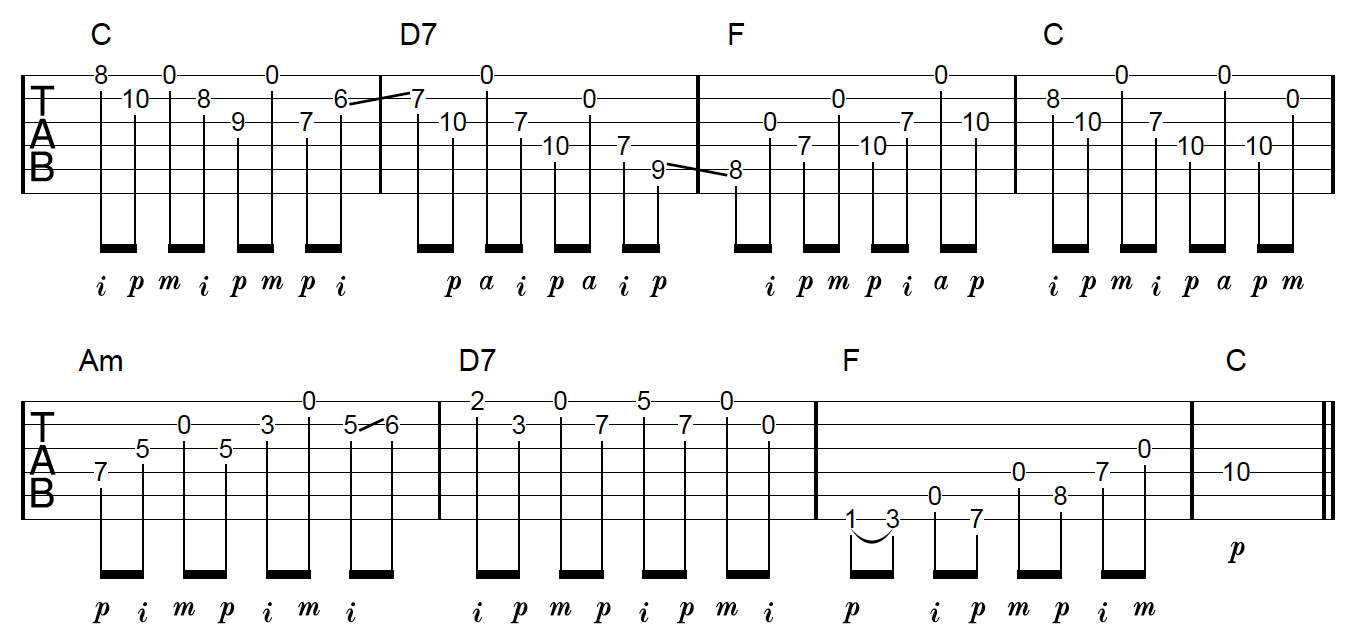
Fingerpicking Pattern Application 1: The Open String Pattern
In this first example of applying a fingerpicking approach to our chord progression, we aren’t even going to play the chords. You will however still hear the harmony of the progression (ie. the chord changes).
Here it is:
Open String Pattern Application
In the example above I am creating a solo line through the chord progression. I am targeting tones of each chord as they occur and is why you can hear the progression even though there are no chords actually being played.
The overall sound is a very unique one due to the fact that I am mixing fretted notes with open strings outside of the open position of the guitar. The open string pattern, while not strictly applied, is used throughout.
Sometimes you will feature fingerpicking patterns rather than use them in isolation. You need to be able to adapt them to each musical situation you find yourself in.
Fingerpicking Pattern Application 2: Banjo Roll Fingerpicking Pattern
Next up is our forward banjo roll and one way we could apply this to our chord progression:
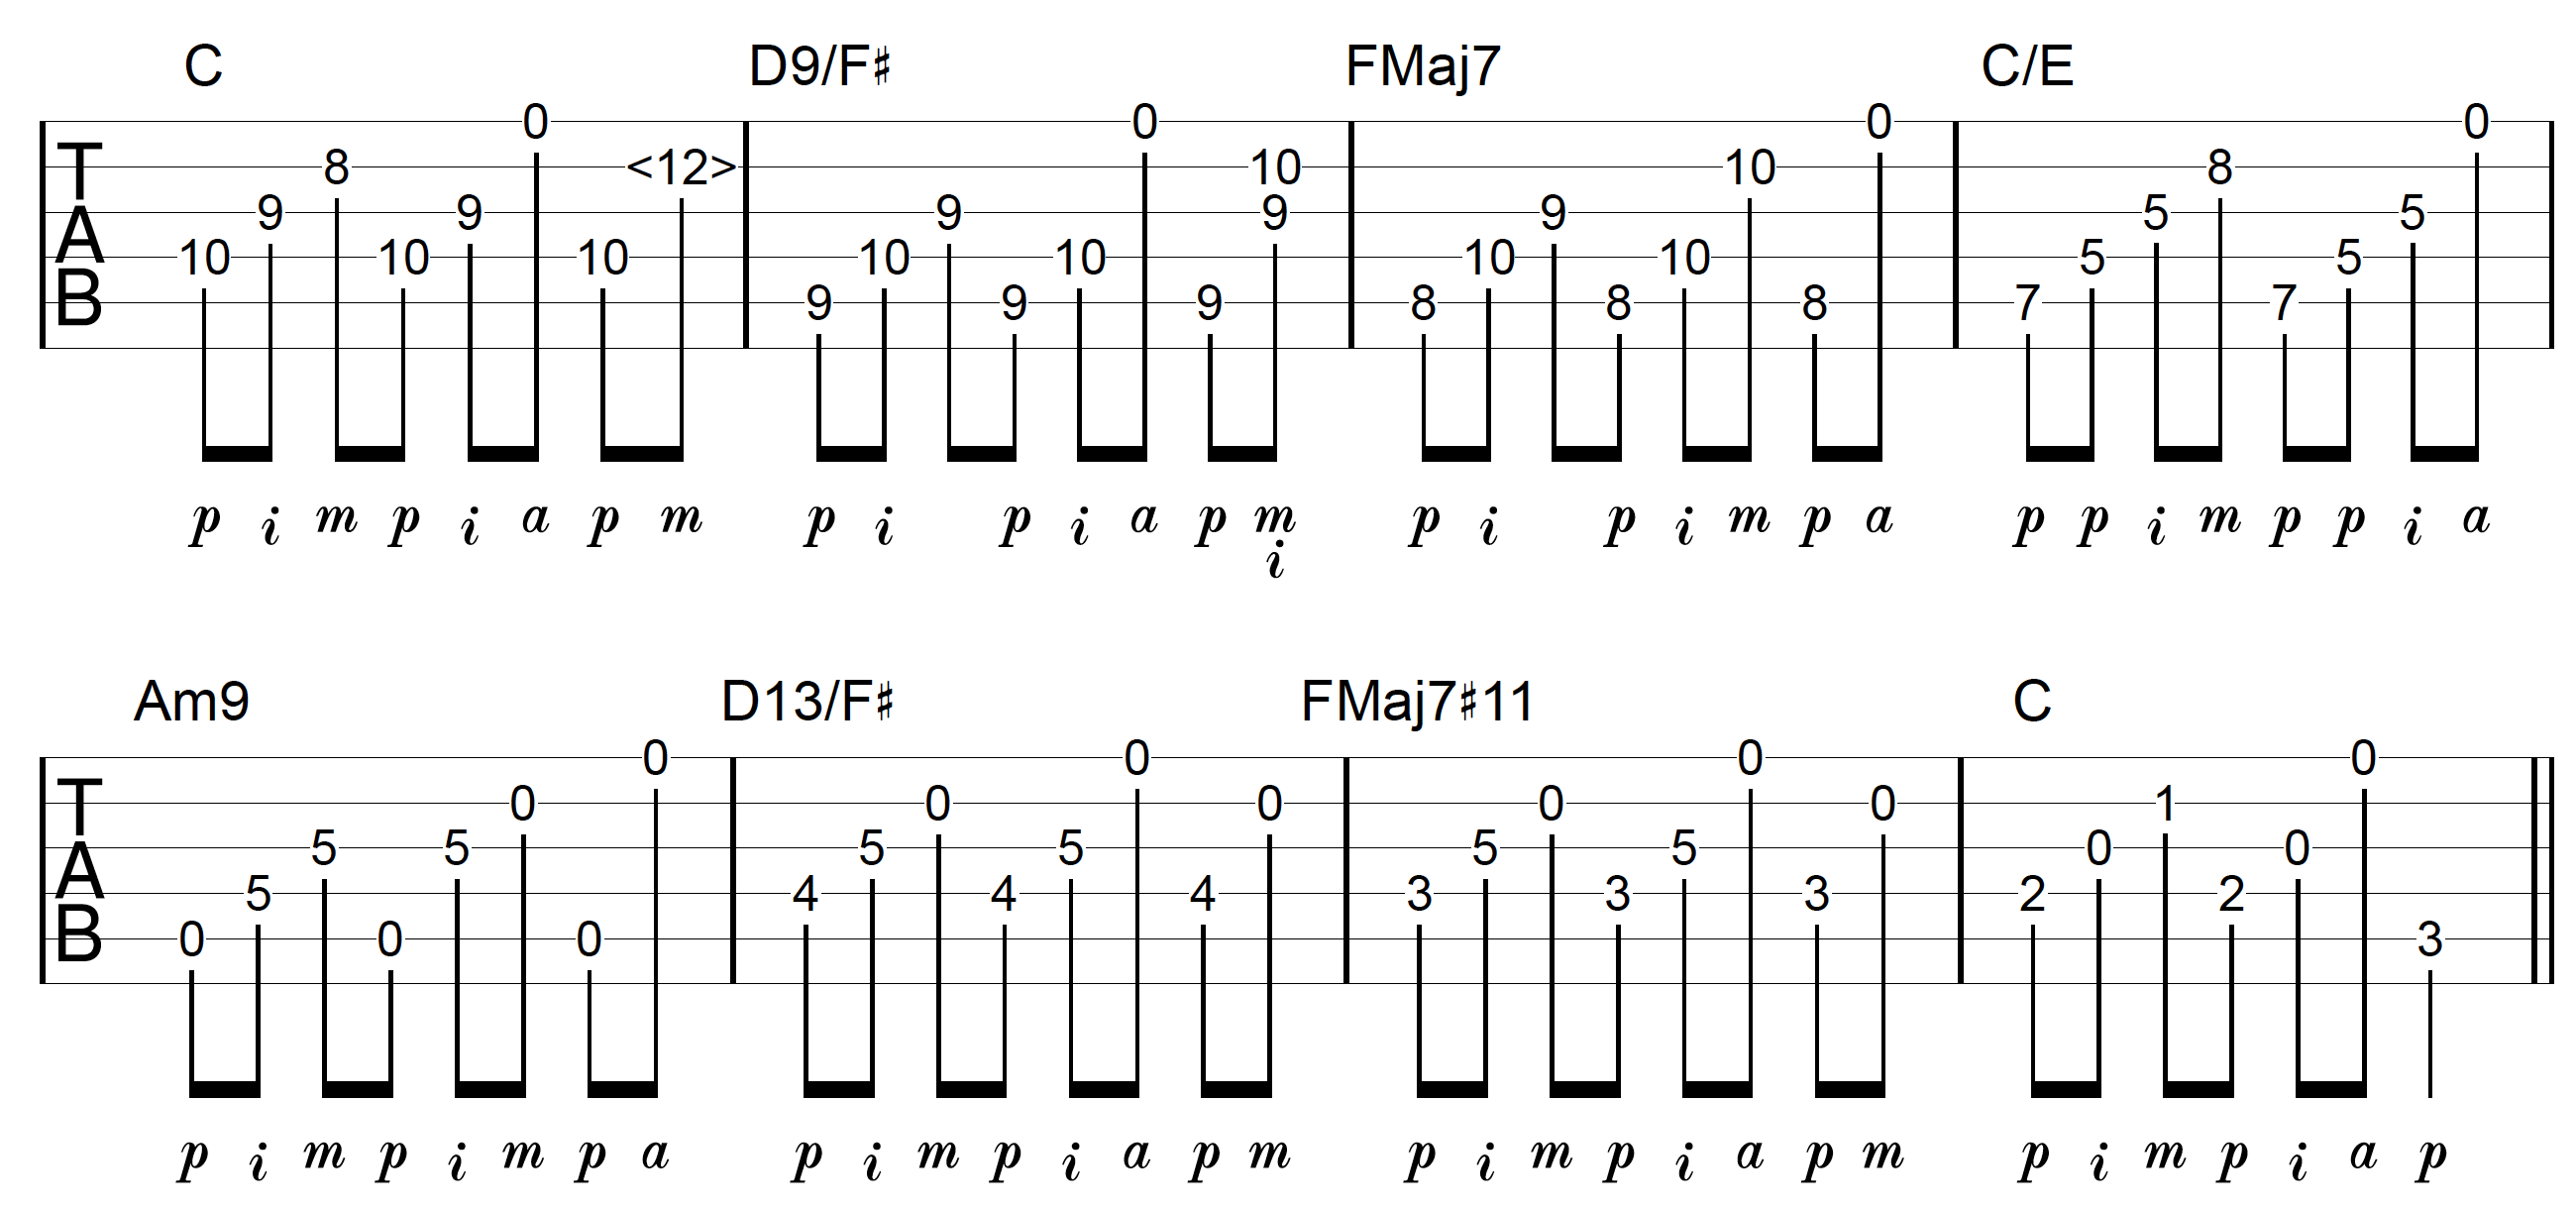
First thing you may notice in this example is that I am using different chord voicing’s than standard open or bar chords. The progression itself has not changed, just the way I am playing the chords.
Here is a little secret for you. Both your picking and fretting hands contribute to your over all fingerpicking sound. Many people focus on the picking hand, but spend very little time on the fretting hand.
Building up a variety of ways to play a chord progression on your guitar will do as much for your fingerpicking as learning patterns will.
If all you have at your disposal are open and bar chords to apply your fingerpicking, then I am afraid you will limit yourself greatly and miss out on a lot of very cool and unique sounds.
You need to focus on both hands to build excitement and variety in your fingerpicking.
You will notice in the example above, I have adapted the banjo roll to fit the chord it is being applied to at the time.
This occurs with the D9/F#, FMaj7, and Am9 chords where I begin the pattern from the 5th string. This is because each of these chords begin from this string.
There are other minor variations I have made to the banjo roll pattern regarding string order too.
There is a tonne more we could do here, but let’s move on to the open string pattern and see what it can bring to our chord progression.
Fingerpicking Pattern Application 3: The Clawhammer
Here is one way we can apply the clawhammer fingerpicking pattern to our progression:
Clawhammer Fingerpicking Application
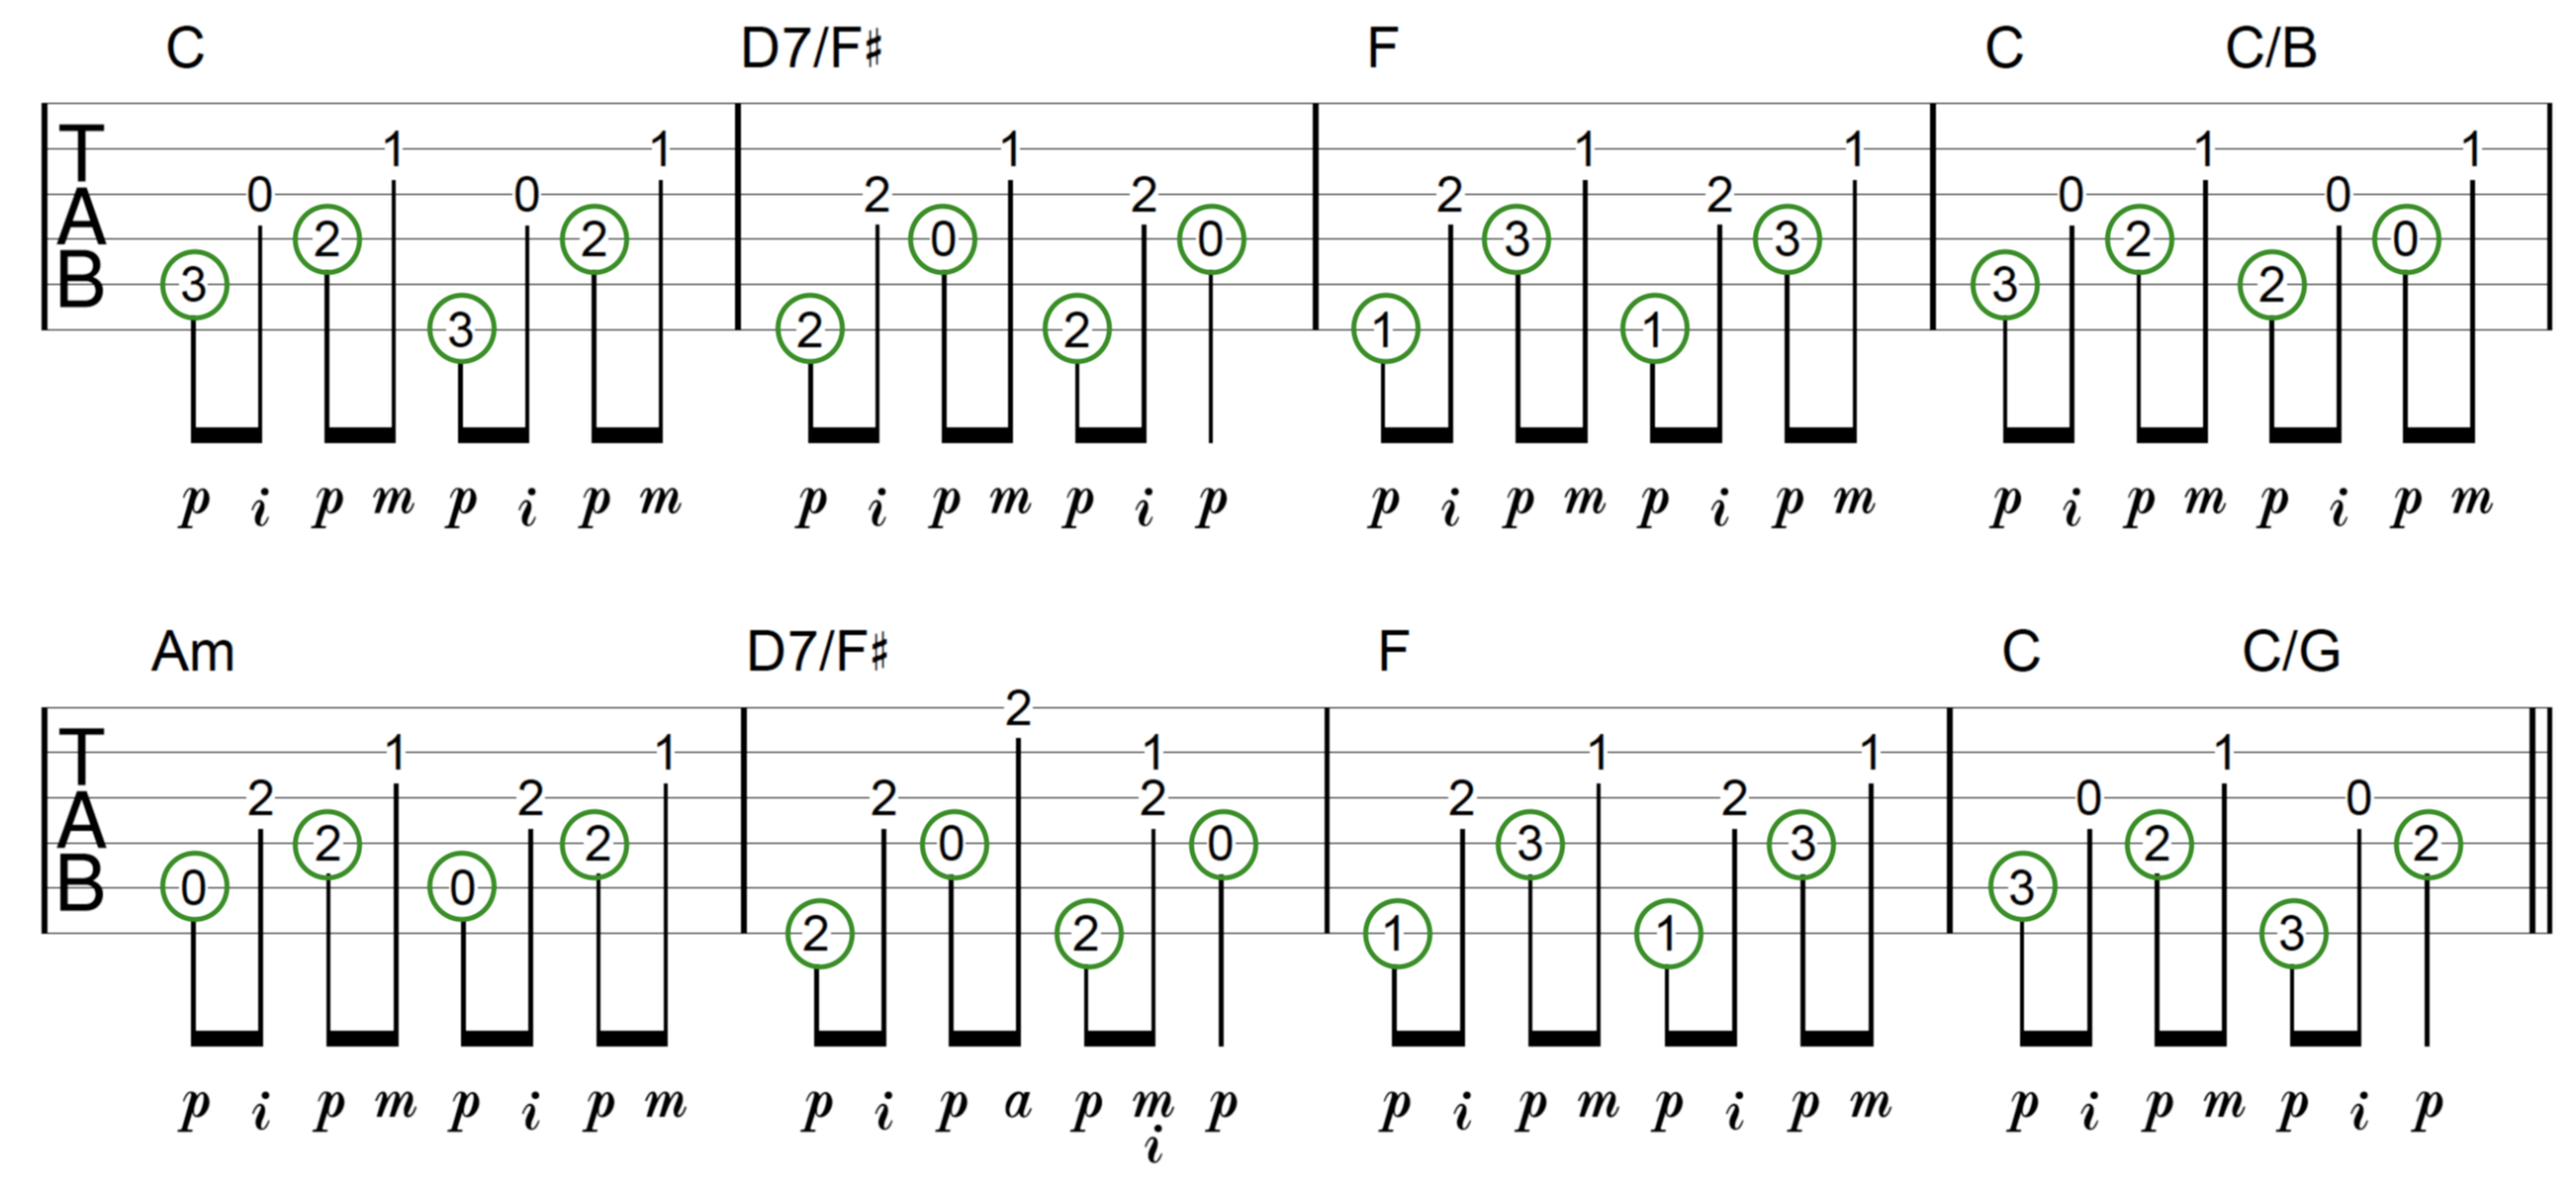
The bass component is the most important part of this pattern.
Notice how it always falls on the beat and follows a consistent pattern as far as the order of the strings. I have highlighted the bass notes so you can see this clearly.
There is much more that could be said about the clawhammer pattern here, however it is beyond the scope of this lesson to do so.
Fingerpicking Etude
The following etude mixes all 3 approaches to our chord progression that we have covered in this lesson:
Hearing these approaches combined back to back in the one example helps highlight the variety you can bring to a single chord progression with a few simple fingerpicking patterns, and some creative approaches as far as your fretting hand is concerned.
I’ve chosen to start with the clawhammer approach, followed by banjo rolls, and finish with the open string fingerpicking solo lines. You could really put them in any order you wish and the etude would still work.
I could create hundreds of pages on any one of the 3 creative applications presented to you here in this lesson, but this is not the point of the article.
Rather it is about taking a few fingerpicking patterns and extracting every square inch of creativity out of them via a single chord progression.
Discover the secrets to truly becoming a master fingerpicking guitarist with this 4 part fingerpicking guitar video series I have created for you.
Simon Candy originates from Melbourne, Australia where he runs his own guitar school specialising in styles including rock, blues, jazz, and fingerpicking. Primarily an acoustic instructor, Simon offers online tuition for acoustic guitar
Post new comment
Please Register or Login to post new comment.